If you hear a loud noise when in a sprint, or any strange drivetrain noise, you may need to tighten your driveside belt.
Procedure
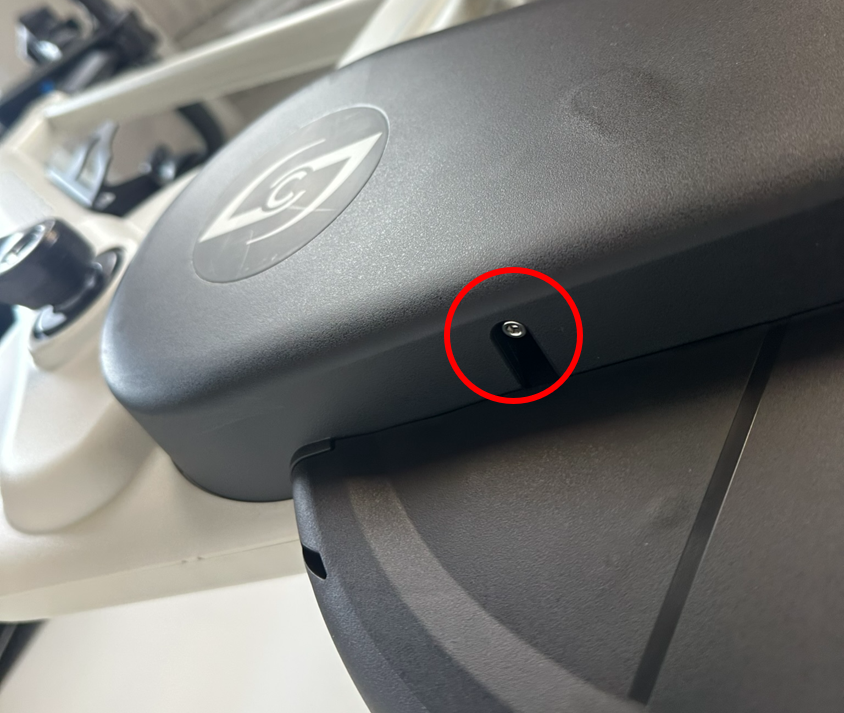
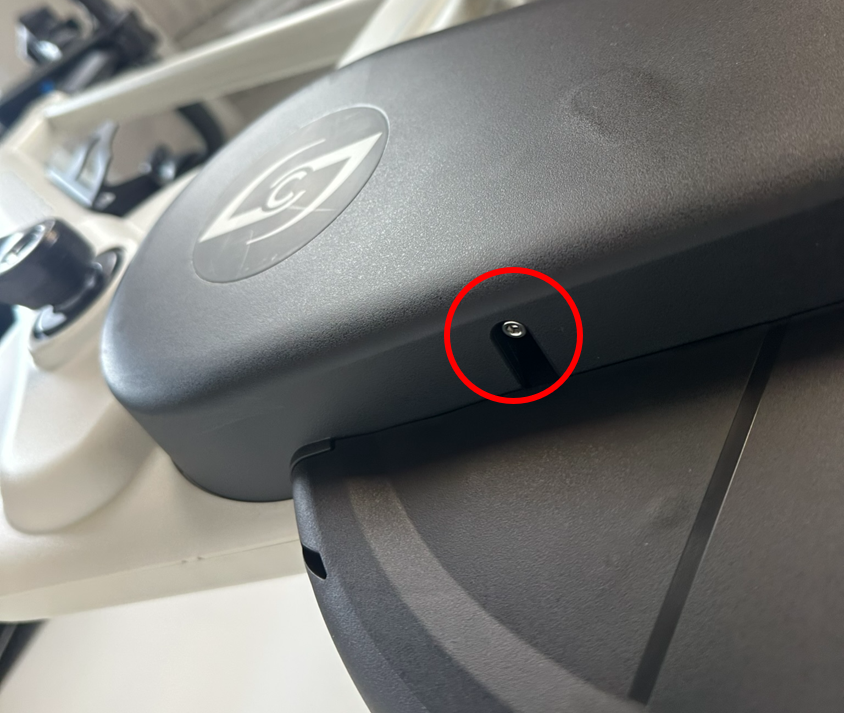
- Locate the screw on the bottom face of the non-driveside cover. With a 3mm hex wrench, loosen the screw 3 revolutions.
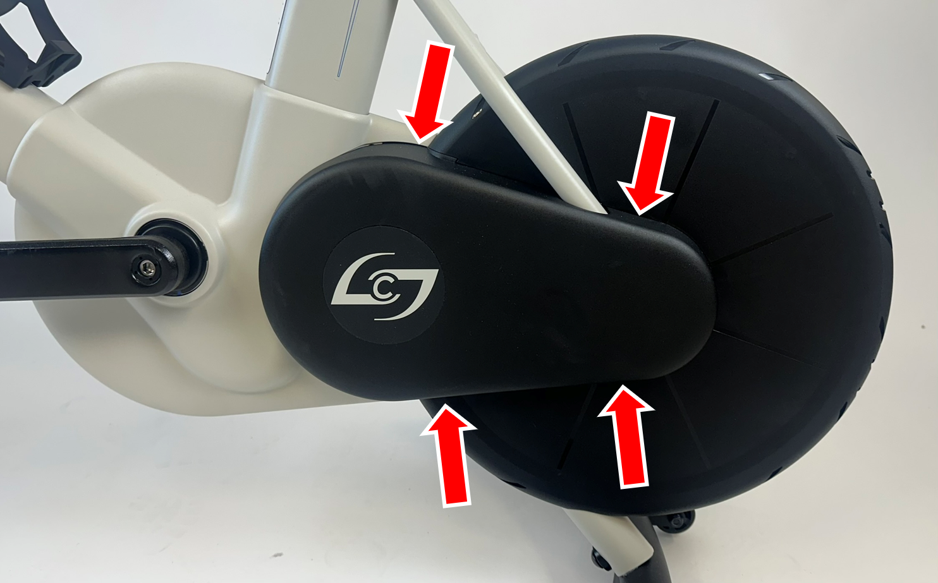
- Remove the rear black cover on the non-driveside of the bike by pinching the top and bottom faces of the cover while pulling away from the bike.
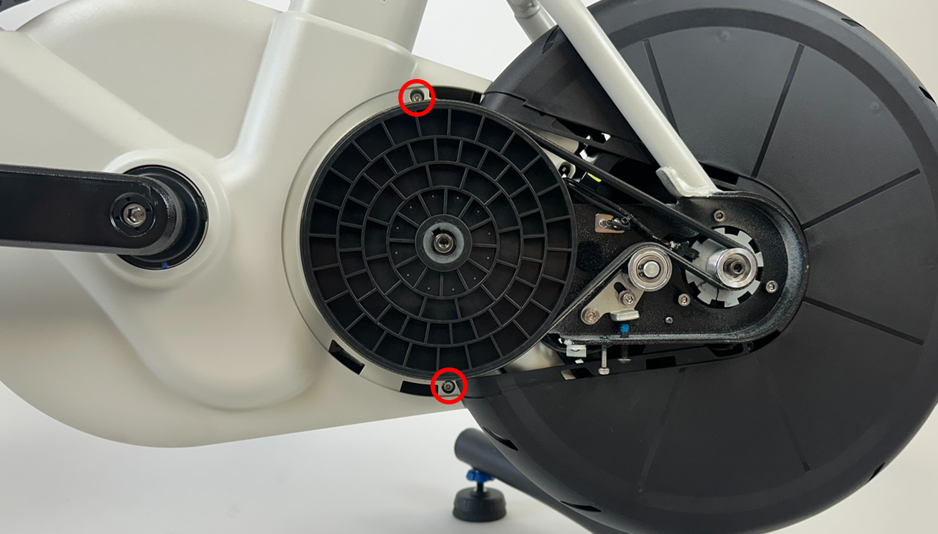
- With a 3 mm hex wrench, remove the two screws above and below the large plastic pulley on the non-driveside.
- Using a small flathead screwdriver, remove the three hole plugs on the cream-colored driveside cover.
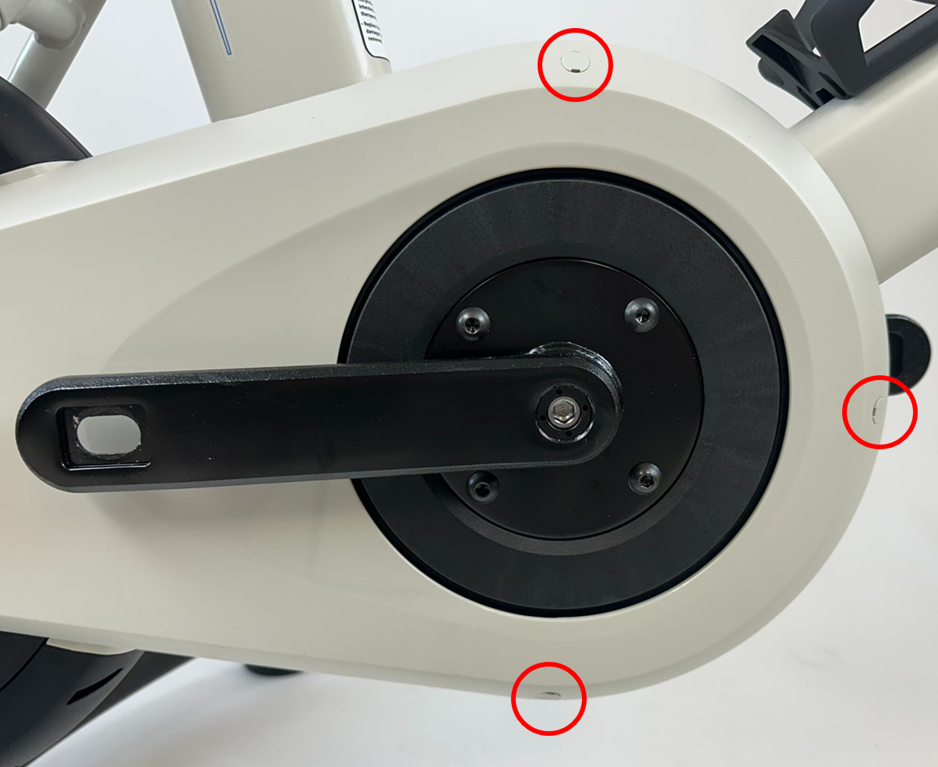
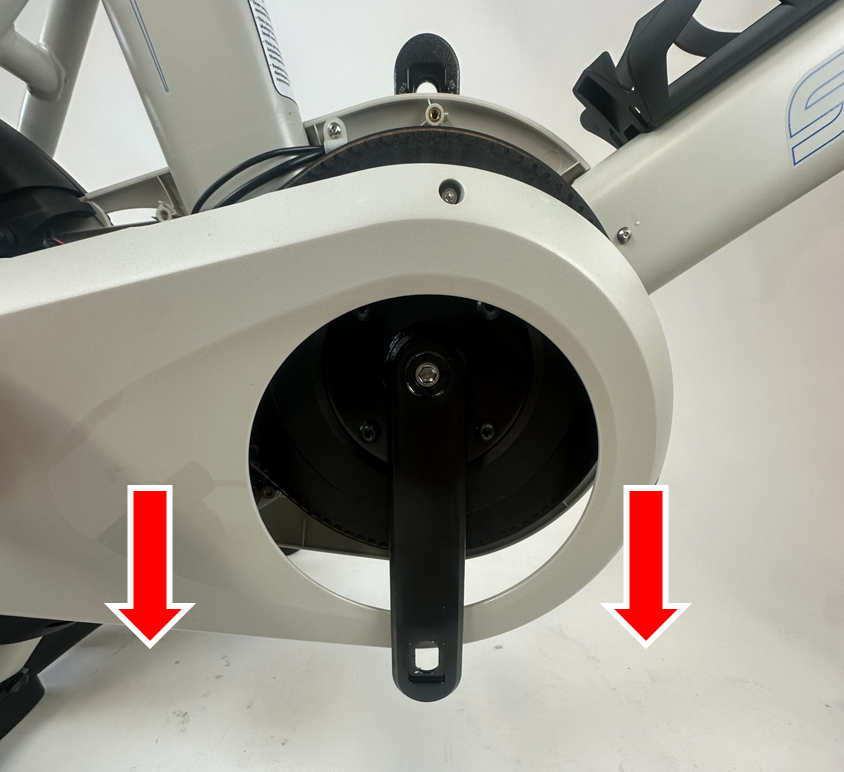
- Set the drive-side crank arm at the 6 o'clock position to remove the driveside cover.
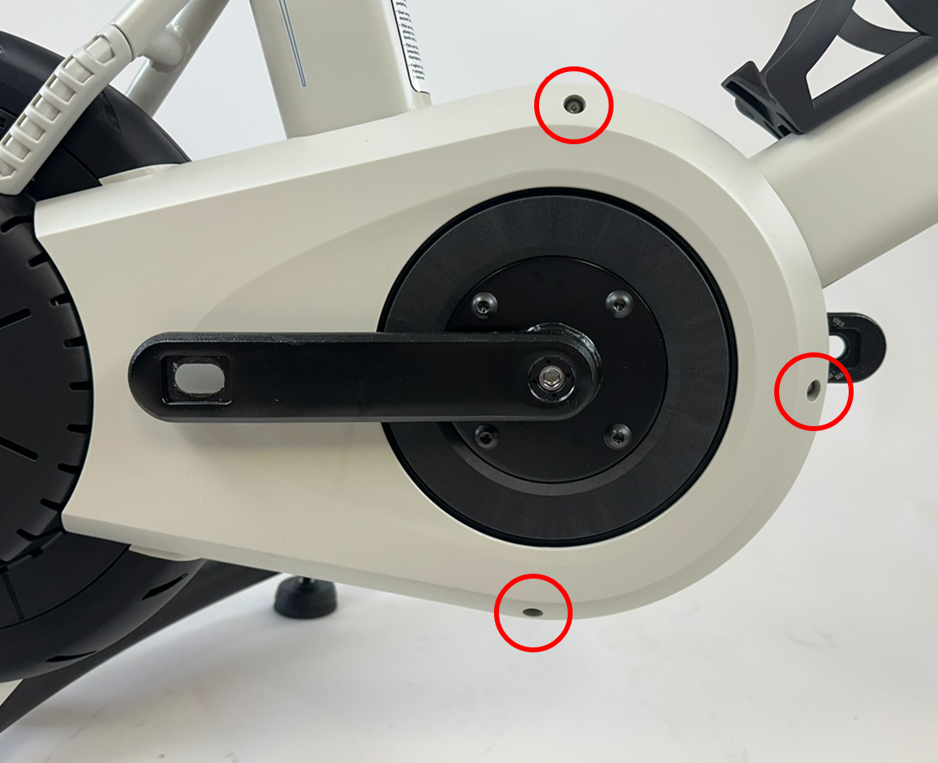
- Set the driveside crank arm at the 6 o'clock position and remove the driveside cover by pulling down and away from the bike.
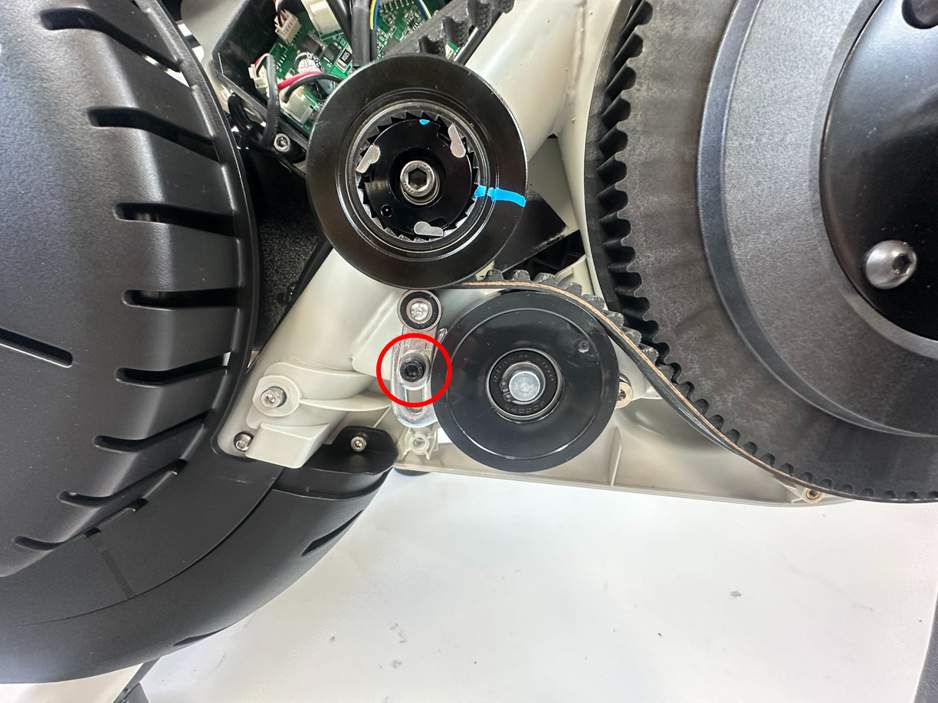
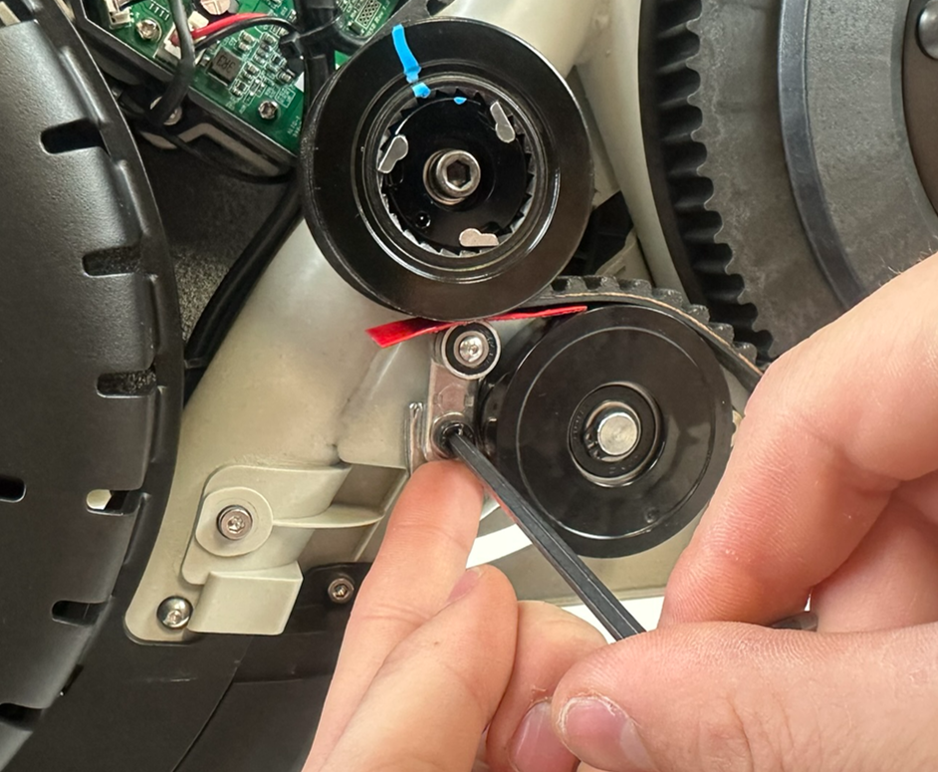
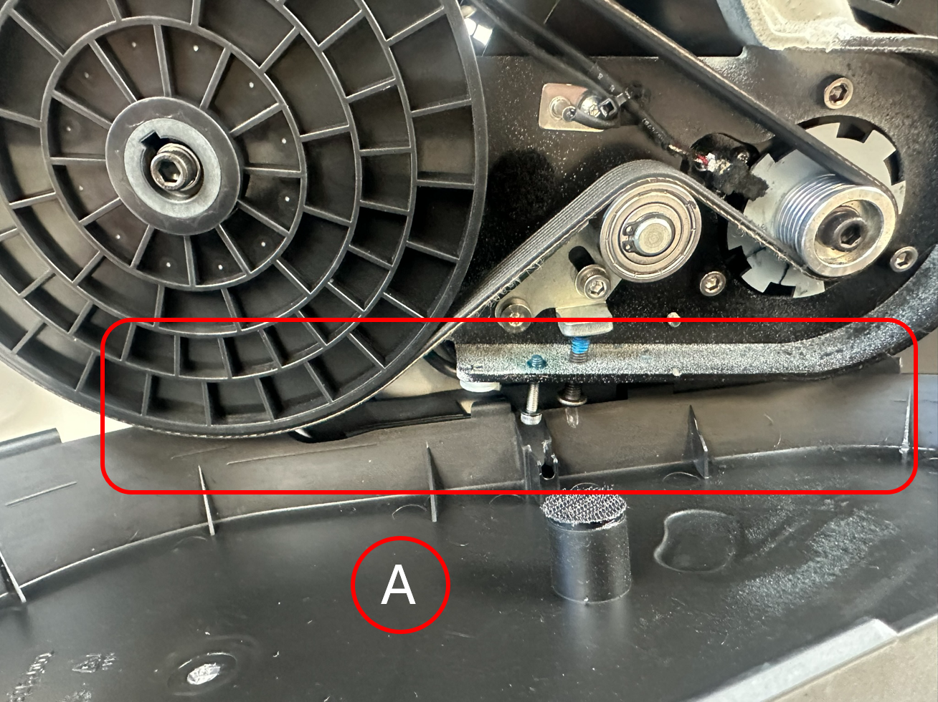
- With a 4 mm hex wrench, loosen (do not remove) the screw on the tension bracket. This will lower the snubber and allow the belt to be tensioned.
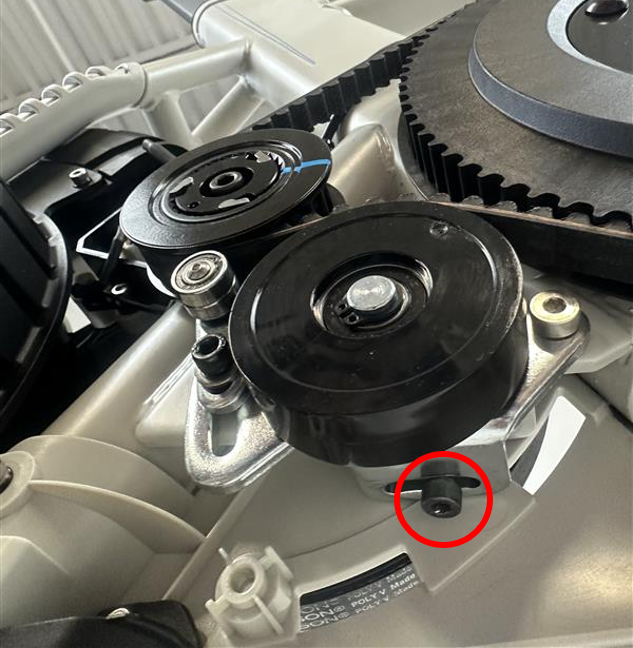
- With a 4 mm hex wrench, tighten the tensioner screw by 1/2 revolution. This tensioner screw is accessible from underneath, the tensioner bracket will raise slightly as the tensioner screw is tightened.
- Locate a shim that is 0.6mm thick and 10mm wide. To make one with a common household item, fold a piece of duct tape onto itself to have 6 total layers. Place the shim between the snubber bearing and the belt.
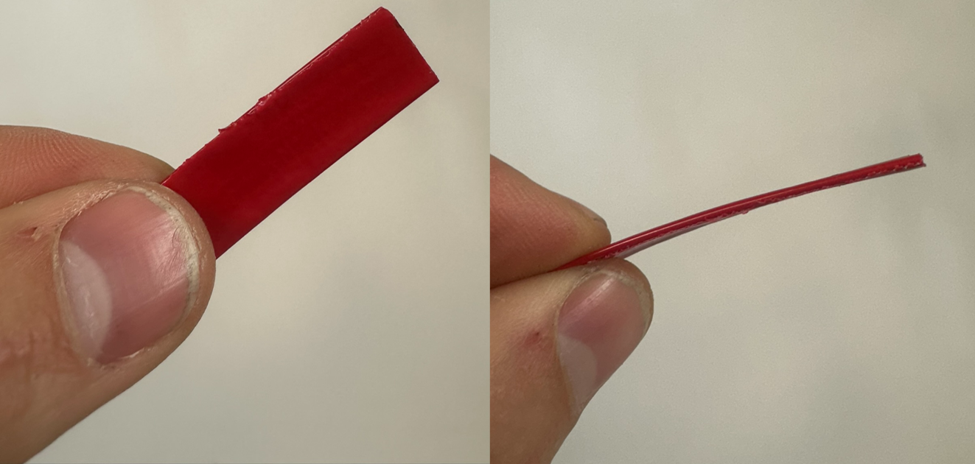
- Hold the snubber bearing against the shim with gentle pressure while re-tightening the screw on the tension bracket with a 4 mm hex wrench.
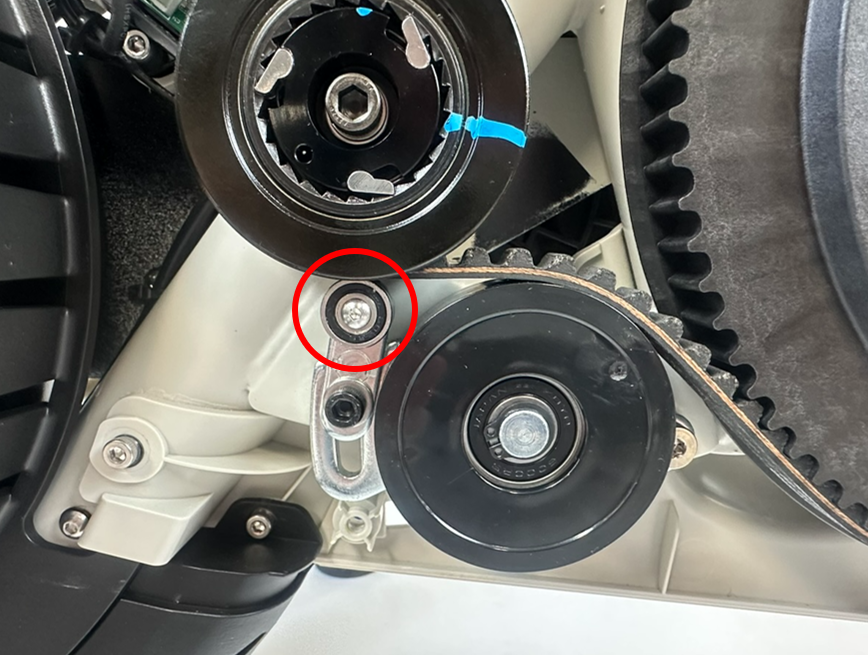
- Spin the cranks backwards to ensure the snubber is not making contact with the belt. Remove the shim by pedaling the bike slowly by hand and ensure the snubber bearing can spin freely without contacting the belt. If the snubber bearing is contacting the belt, add a layer to the shim and repeat the process.
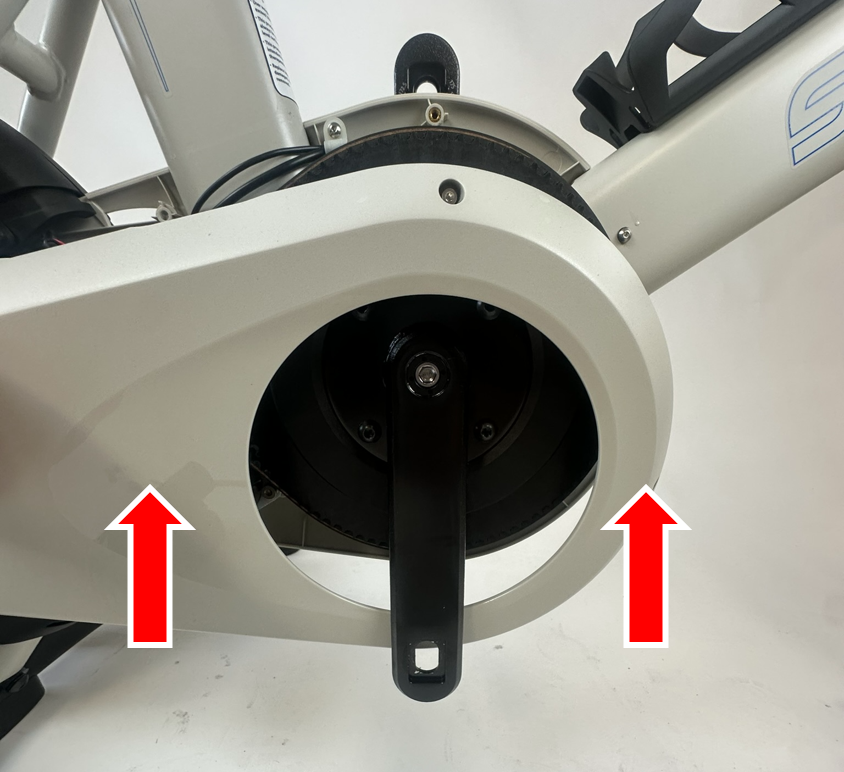
- Install the driveside cover of the bike by sliding it into position around the crank arm at the 6 o'clock position.
- With a 3 mm hex wrench, tighten the three screws on the driveside cover.
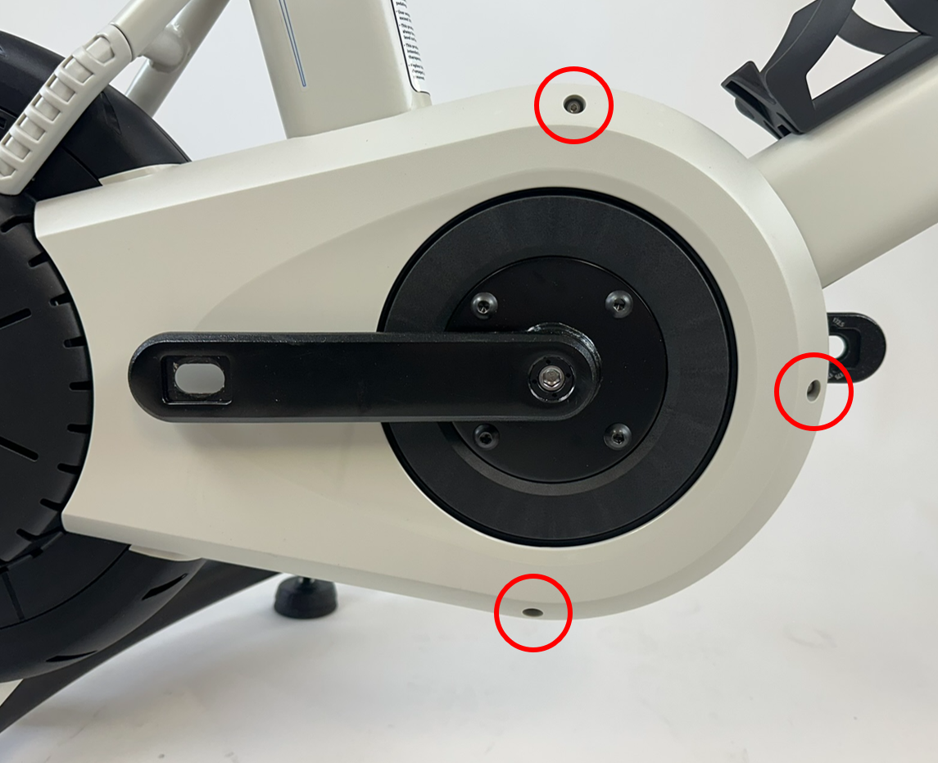
- Install the three hole plugs on the driveside cover. A small amount of isopropyl alcohol will reduce friction and help the plugs sit flush with the cover.
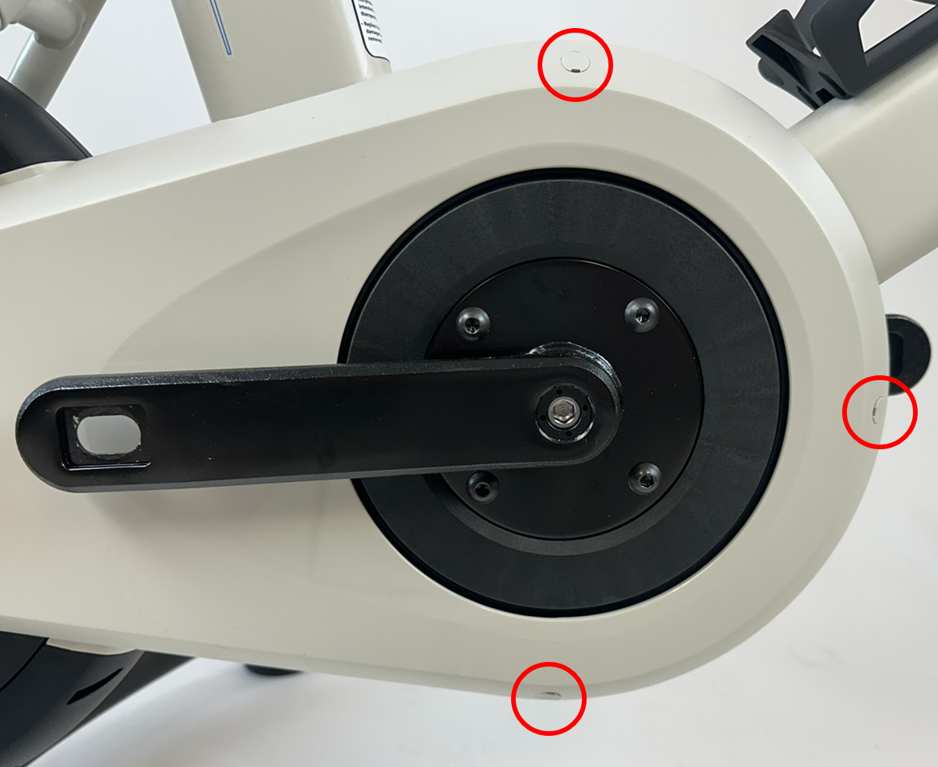
- With a 3mm hex wrench, tighten the two screws above and below the large plastic pulley on the non-driveside.
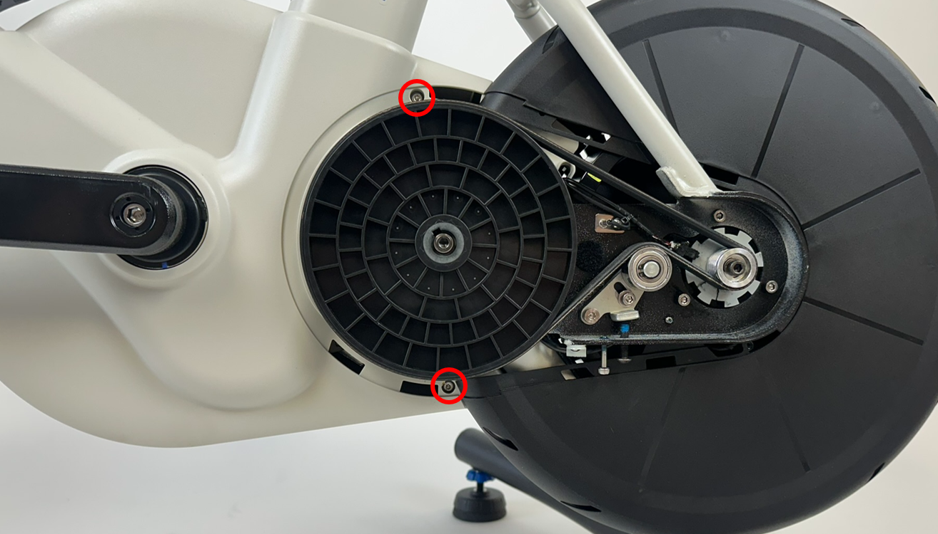
- Install the non-driveside cover by aligning the tabs while pushing into the bike. For best practice, align the 4 tabs along the bottom edge of the cover first. Next, work counter-clockwise to align and insert the tabs at the rear of the bike. Finally, apply pressure to insert the tabs along the top edge of the cover.
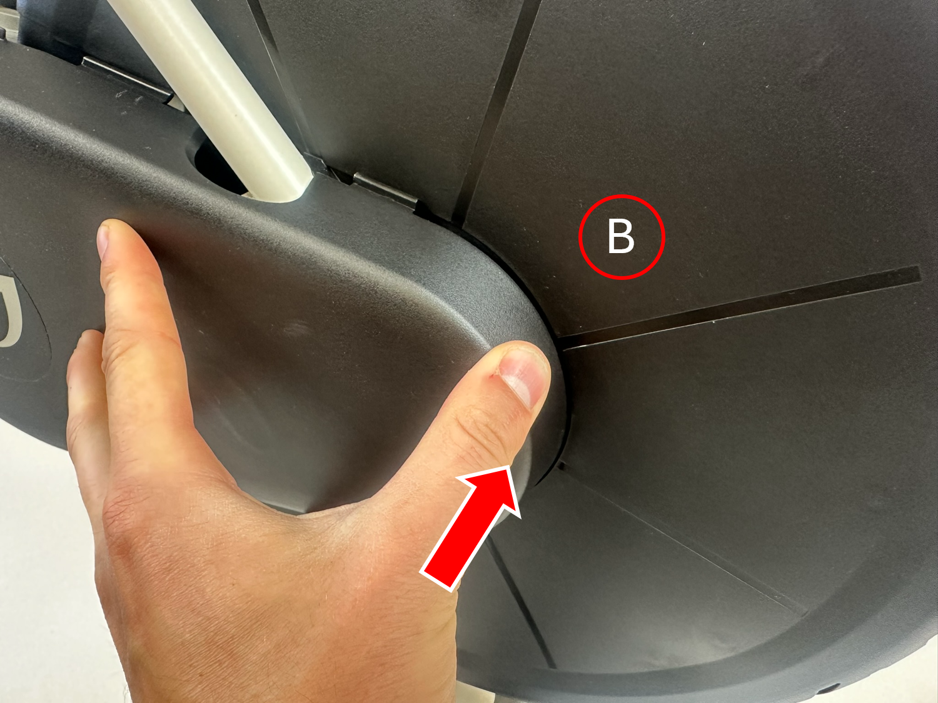
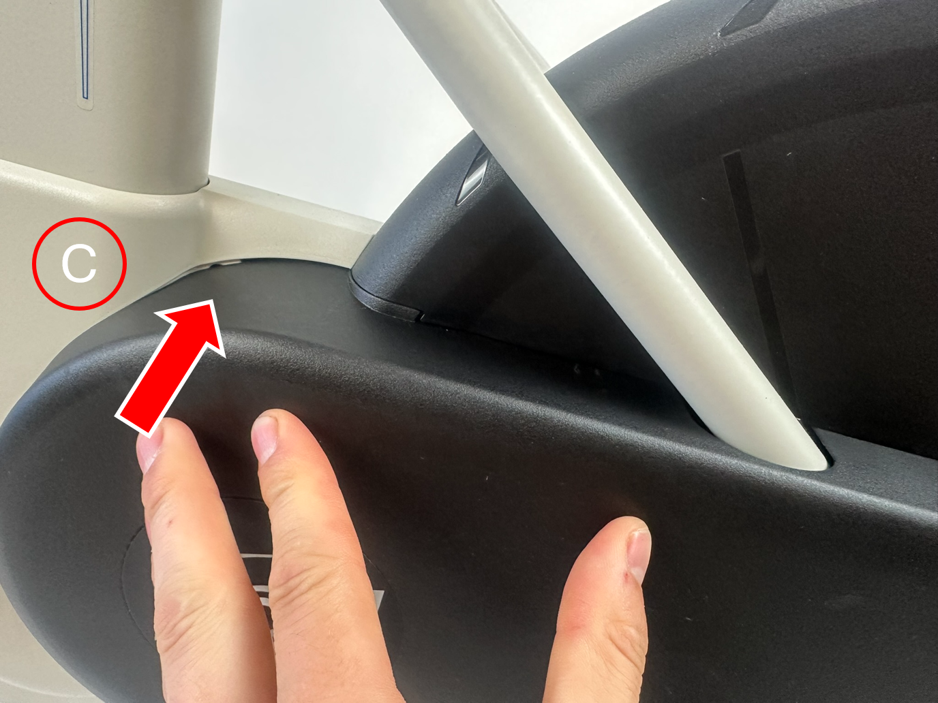
- With a 3 mm hex wrench, re-tighten the screw on the bottom of the black cover 3 revolutions.
Was this article helpful?
That’s Great!
Thank you for your feedback
Sorry! We couldn't be helpful
Thank you for your feedback
Feedback sent
We appreciate your effort and will try to fix the article